Webhook guide: Smartlead
How Smartlead webhooks work, how to set them up with OutboundSync, and some things to consider.
Webhooks are a powerful way to receive real-time notifications about events happening within your Smartlead account.
By properly configuring your webhooks with OutboundSync, you can automate workflows, integrate with your CRM, generate reporting on your campaign attribution, and more.
What Are Smartlead Webhooks?
A webhook is an HTTP callback that sends data to a specified URL when certain events occur in your Smartlead account.
Instead of constantly polling Smartlead for updates, webhooks allow you to receive event notifications instantly, enabling seamless integration with your applications.
Setting Up Webhooks in Smartlead
Smartlead allows you to configure webhooks at three different levels:
- User Level: Applies to all activities under your user account.
- Client Level: Applies to all activities under a specific client.
- Campaign Level: Applies to activities within a specific campaign.
Steps to Configure a Webhook:
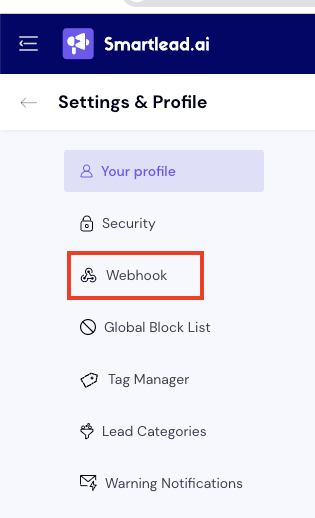
1. Navigate to the Webhooks Section: Log in to your Smartlead account and go to the Settings menu.
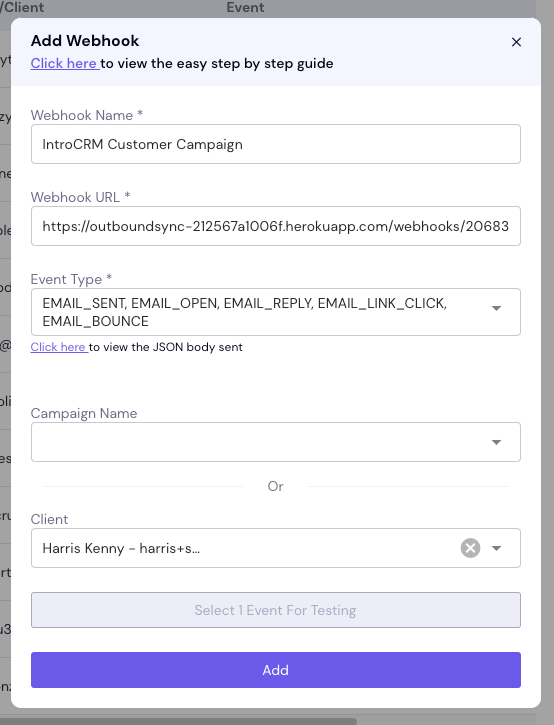
2. Click on "Add Webhook"

3. Select the Appropriate Level: Choose whether you want to set up a webhook at the user, client, or campaign level. For more context, read below.
An agency (or client of an agency) will typically use the client-level webhook to send that data to OutboundSync.
A team using a single Smartlead account will typically set up a single user-level webhook to send that data to OutboundSync.
If you are using client-level webhooks, DO NOT use any user-level webhooks. If you do, your client-level webhook payloads will be blocked. OutboundSync will not receive the data from Smartlead and your clients' data will not sync.
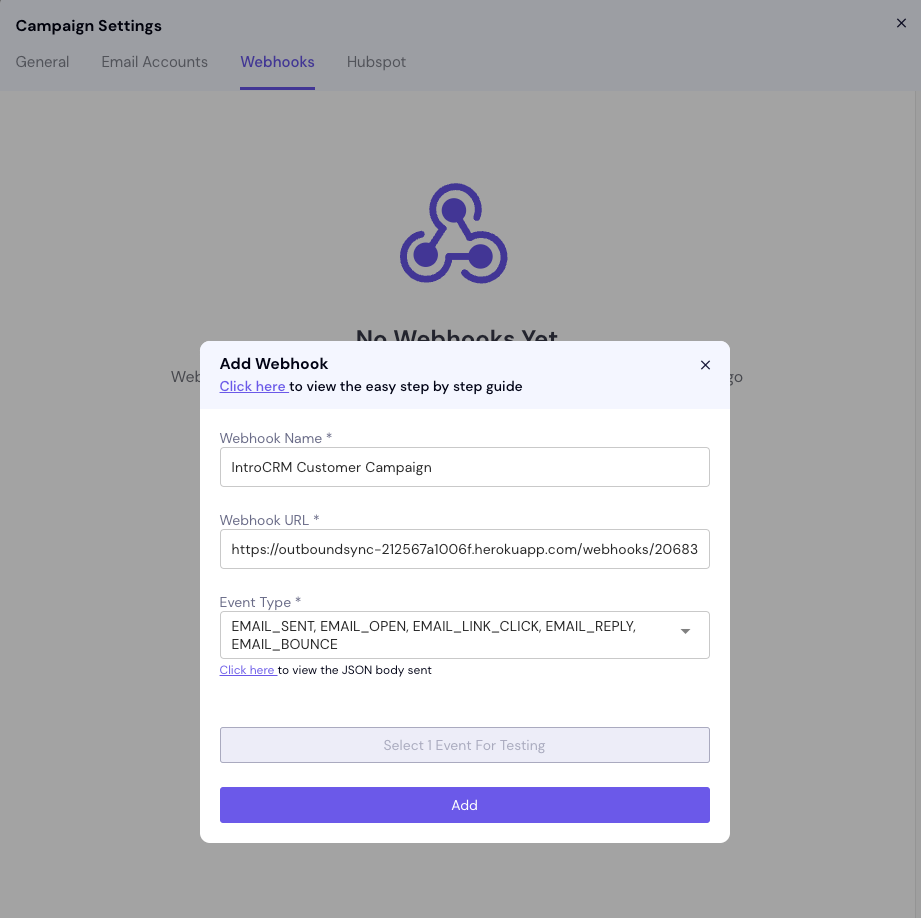
3. Enter the Webhook URL: Provide the endpoint URL where you want to receive the webhook notifications. (This is generated by OutboundSync.)
4. Select Event Types: Choose the specific events you want to receive notifications for. You may also want to enable Category-Based Filters in OutboundSync.
5. Save the Configuration: Click Save to activate the webhook.
Determine your Smartlead webhook policy
Now you need to decide how you want to set your newly created webhook in Smartlead. Smartlead provides two ways of doing this.
- Create a Client webhook. Generate a single webhook for your entire account by creating a Client. You can do this by creating a ghost or dummy client account for yourself. This way, every time you run a campaign, you can attach yourself as a client and use the same webhook.

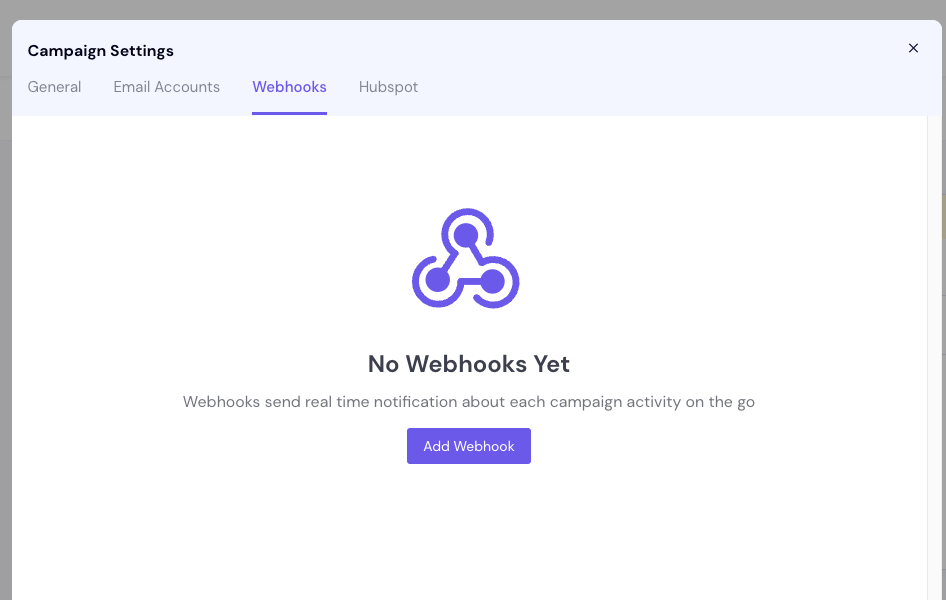
- Add a webhook to each campaign. Alternatively, you can generate one or multiple webhooks and attach them to each campaign. This is more manual and generally not advised unless you have campaigns dedicated to each sales rep. To do this, for each campaign, go to Campaign Settings then click the Webhooks tab, click Add webhook, and paste the webhook URL from OutboundSync. Then select which events to sync.


While it depends on your use case, most users choose to create a User or Client webhook.
Webhook Event Types
Smartlead supports a variety of event types that you can subscribe to:
- Lead Category Updated
- Email Bounce
- Link Clicked
- Lead Unsubscribed
- Email Opened
- Email Sent
- Email Replied
- Threaded Replies
- Campaign Status Change
- Untracked Replies
- Manual Step Reached
For a complete list of event types and their payloads, refer to the Smartlead Webhook Guide.
Webhook Priority Algorithm
Please note that regardless of the number of webhook settings configured, Smartlead will only send notifications for two types: one for Slack and the other for Normal.
The priority algorithm logic is outlined below:
Priority Cases:
- P1: User Level
- P2: Client Level
- P3: Campaign Level
Case 1: User-Level Prioritization
If a user has a user-level webhook configured, notifications will be sent to that URL. However, if the user desires webhook notifications at the client level, kindly request the user to remove the user-level webhook.
If a user-level webhook exists, client or campaign level webhooks will not function.
Case 2: Last Update Priority
- For users with multiple user-level webhooks, Smartlead will select the last updated one.
- For users with multiple client-level webhooks, Smartlead will also select the last updated one.
- The same logic applies to campaigns: If a customer has multiple campaign-level webhooks (without user or client level), Smartlead will choose the last updated one.
Limitations and Considerations
- No Webhook Logs: Note that Smartlead does not maintain any data about webhook logs. OutboundSync logs are available and we can help you review them along with our internal server diagnostic logs.
- Error Handling: As of February 20, 2025, Smartlead will retry sending webhook payloads up to 5 times with a 300 second (5 minute) intervals between attempts. OutboundSync is always developing new methods to ensure we have the latest data available from Smartlead.
- Security: Implement proper security measures on your Smartlead account to that will be sending webhook payloads to OutboundSync.
Best Practices
- Test Your Webhooks: Before deploying to production, test your webhooks using Smartlead's webhook test payload function and OutboundSync's sync test function.
- Use Unique URLs: If setting up webhooks at multiple levels, use unique URLs to distinguish between different event sources. Remember that a user-level webhook will override any lower level webhook.
- Monitor Performance: Keep an eye on your records in your CRM and history in OutboundSync. If anything seems off, contact us so we can help you diagnose the issue.
Conclusion
Webhooks are an integral part of automating your workflows with Smartlead and your CRM. By understanding how they work and setting them up correctly, you can run a fully integrated outbound operation that integrates with your automations, workflows, and sales processes.
