Overview
In this article, we will provide step by step instructions for how to connect Smartlead to OutboundSync via API key.
This step is necessary to do things like creating blocklists, where you can identify contacts in HubSpot and ensure they do not receive any email from Smartlead.
Step 1. Generate a Smartlead API key in Smartlead
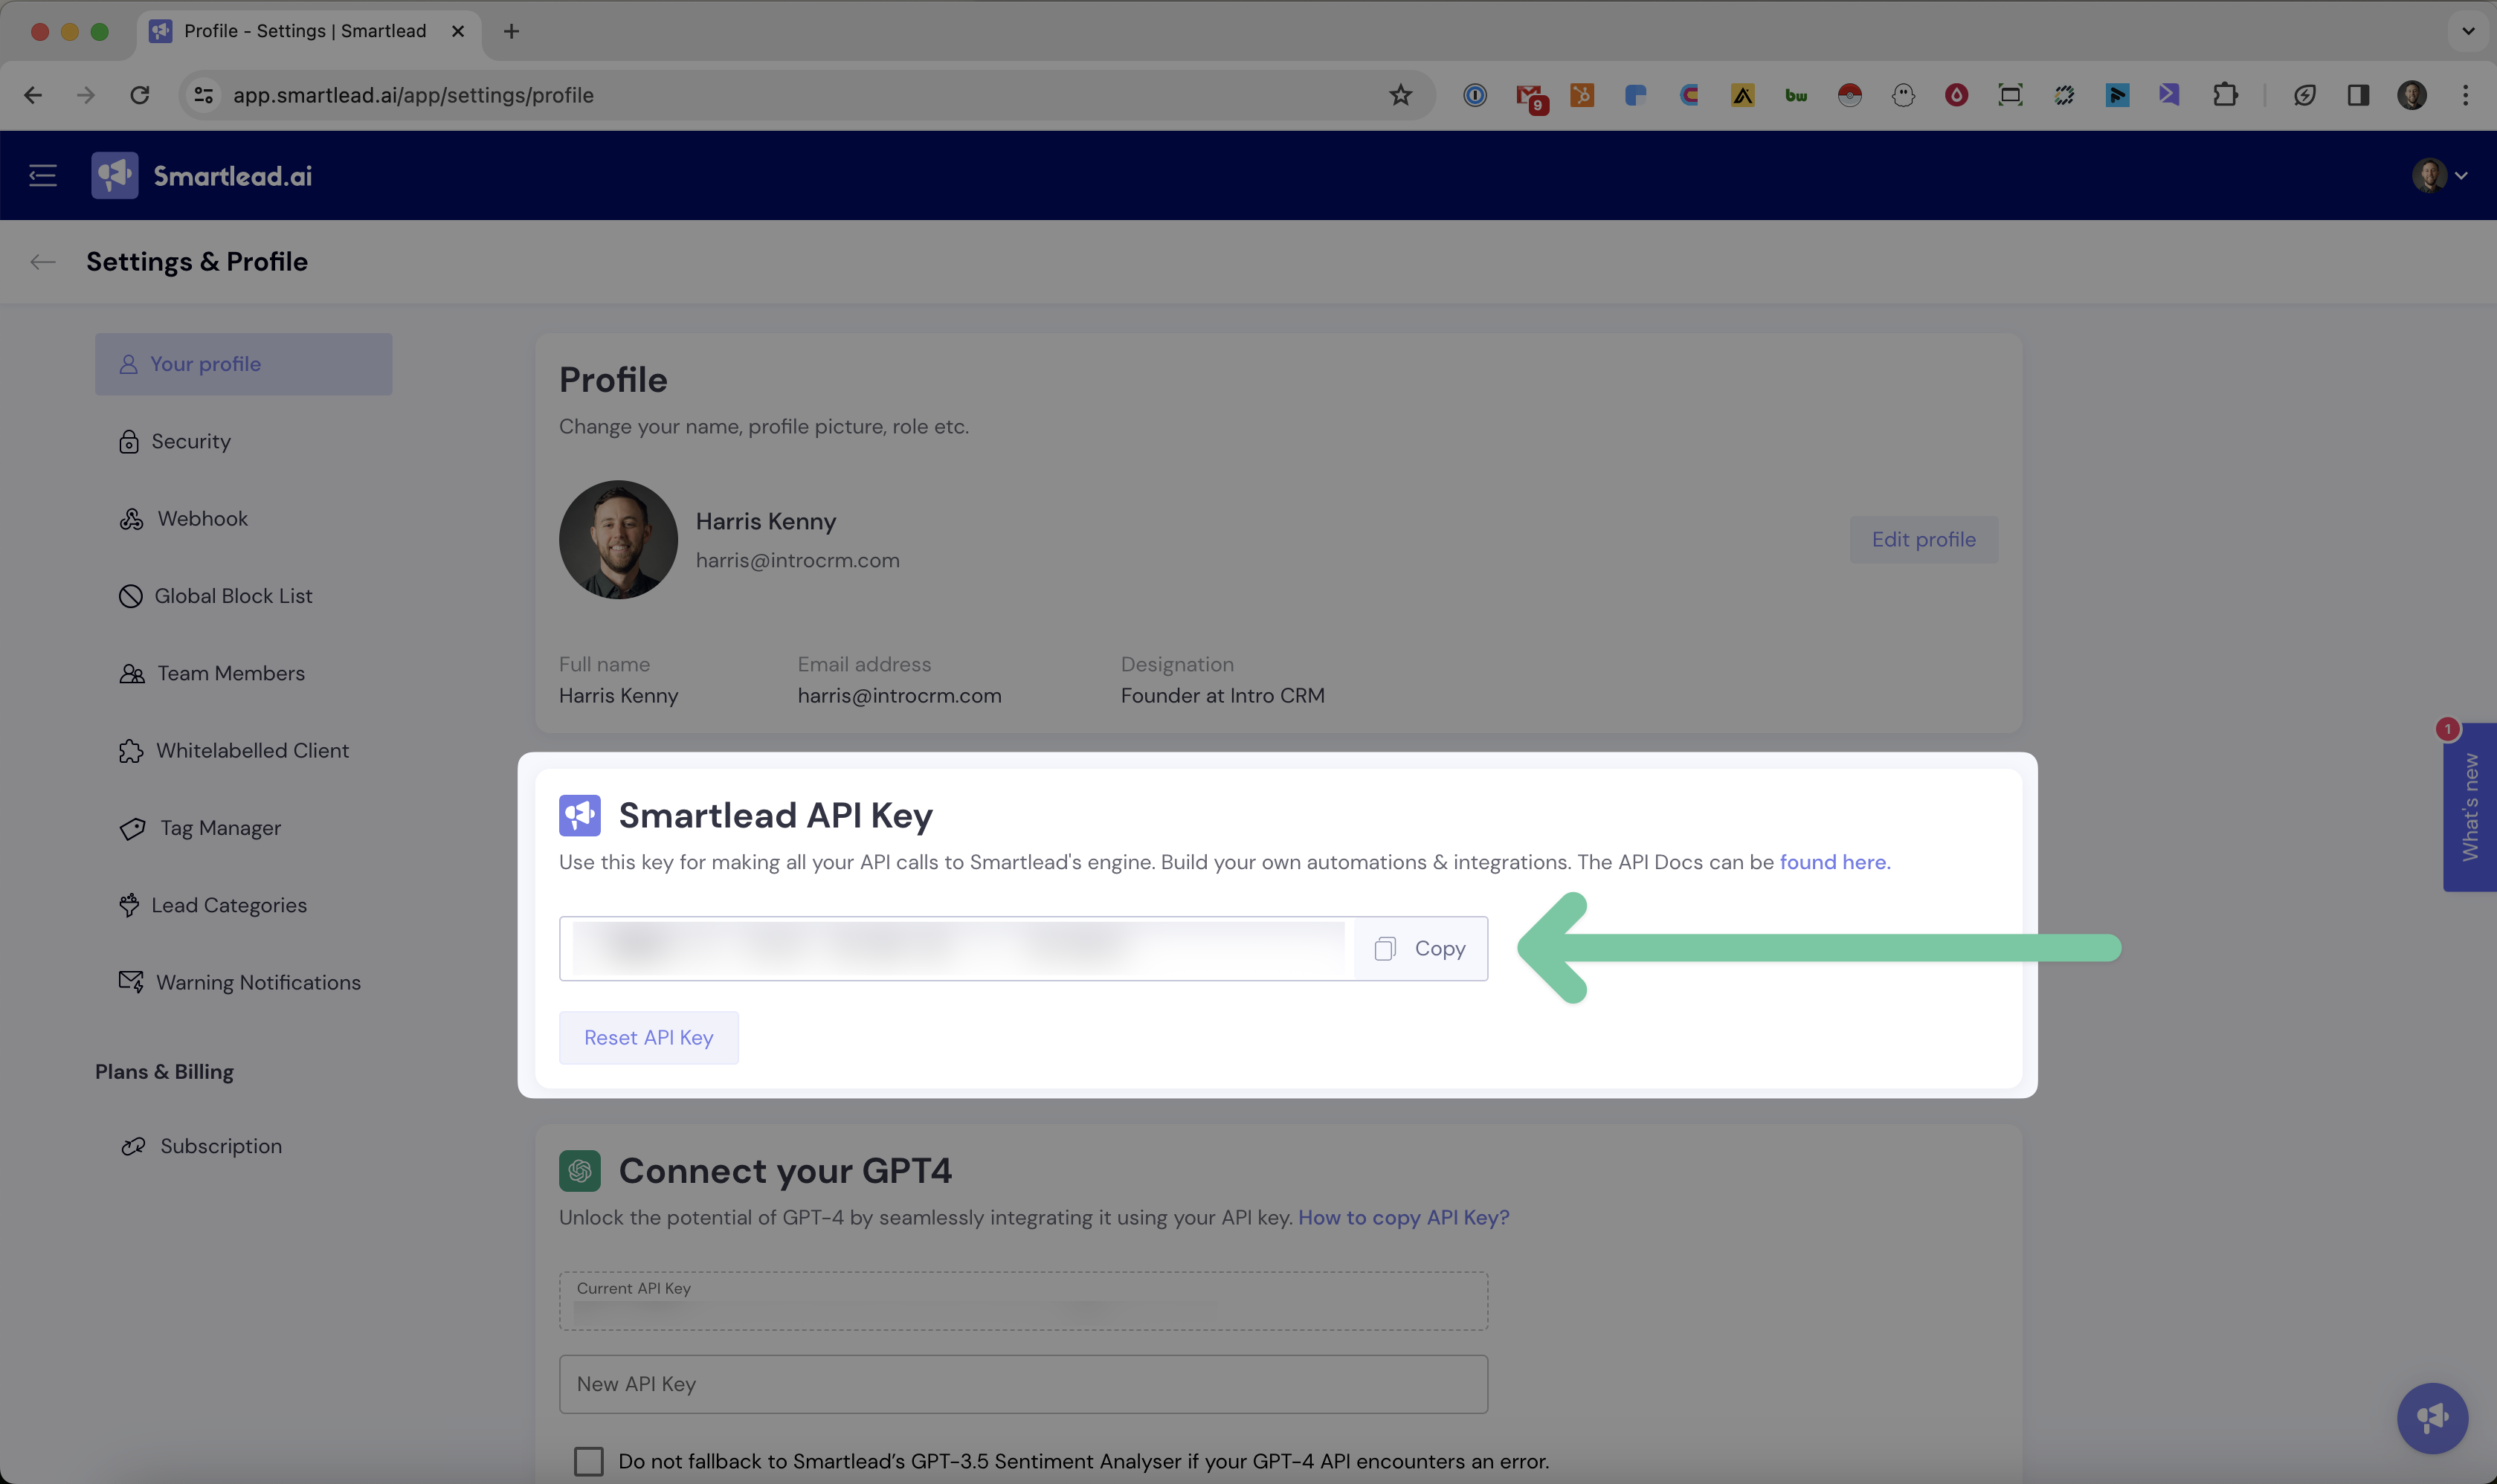
First, log in to Smartlead and go to your profile:
https://app.smartlead.ai/app/settings/profile
If you do not already have a Smartlead API key, then generate a new one and copy it.
Step 2. Paste your Smartlead API key into OutboundSync.
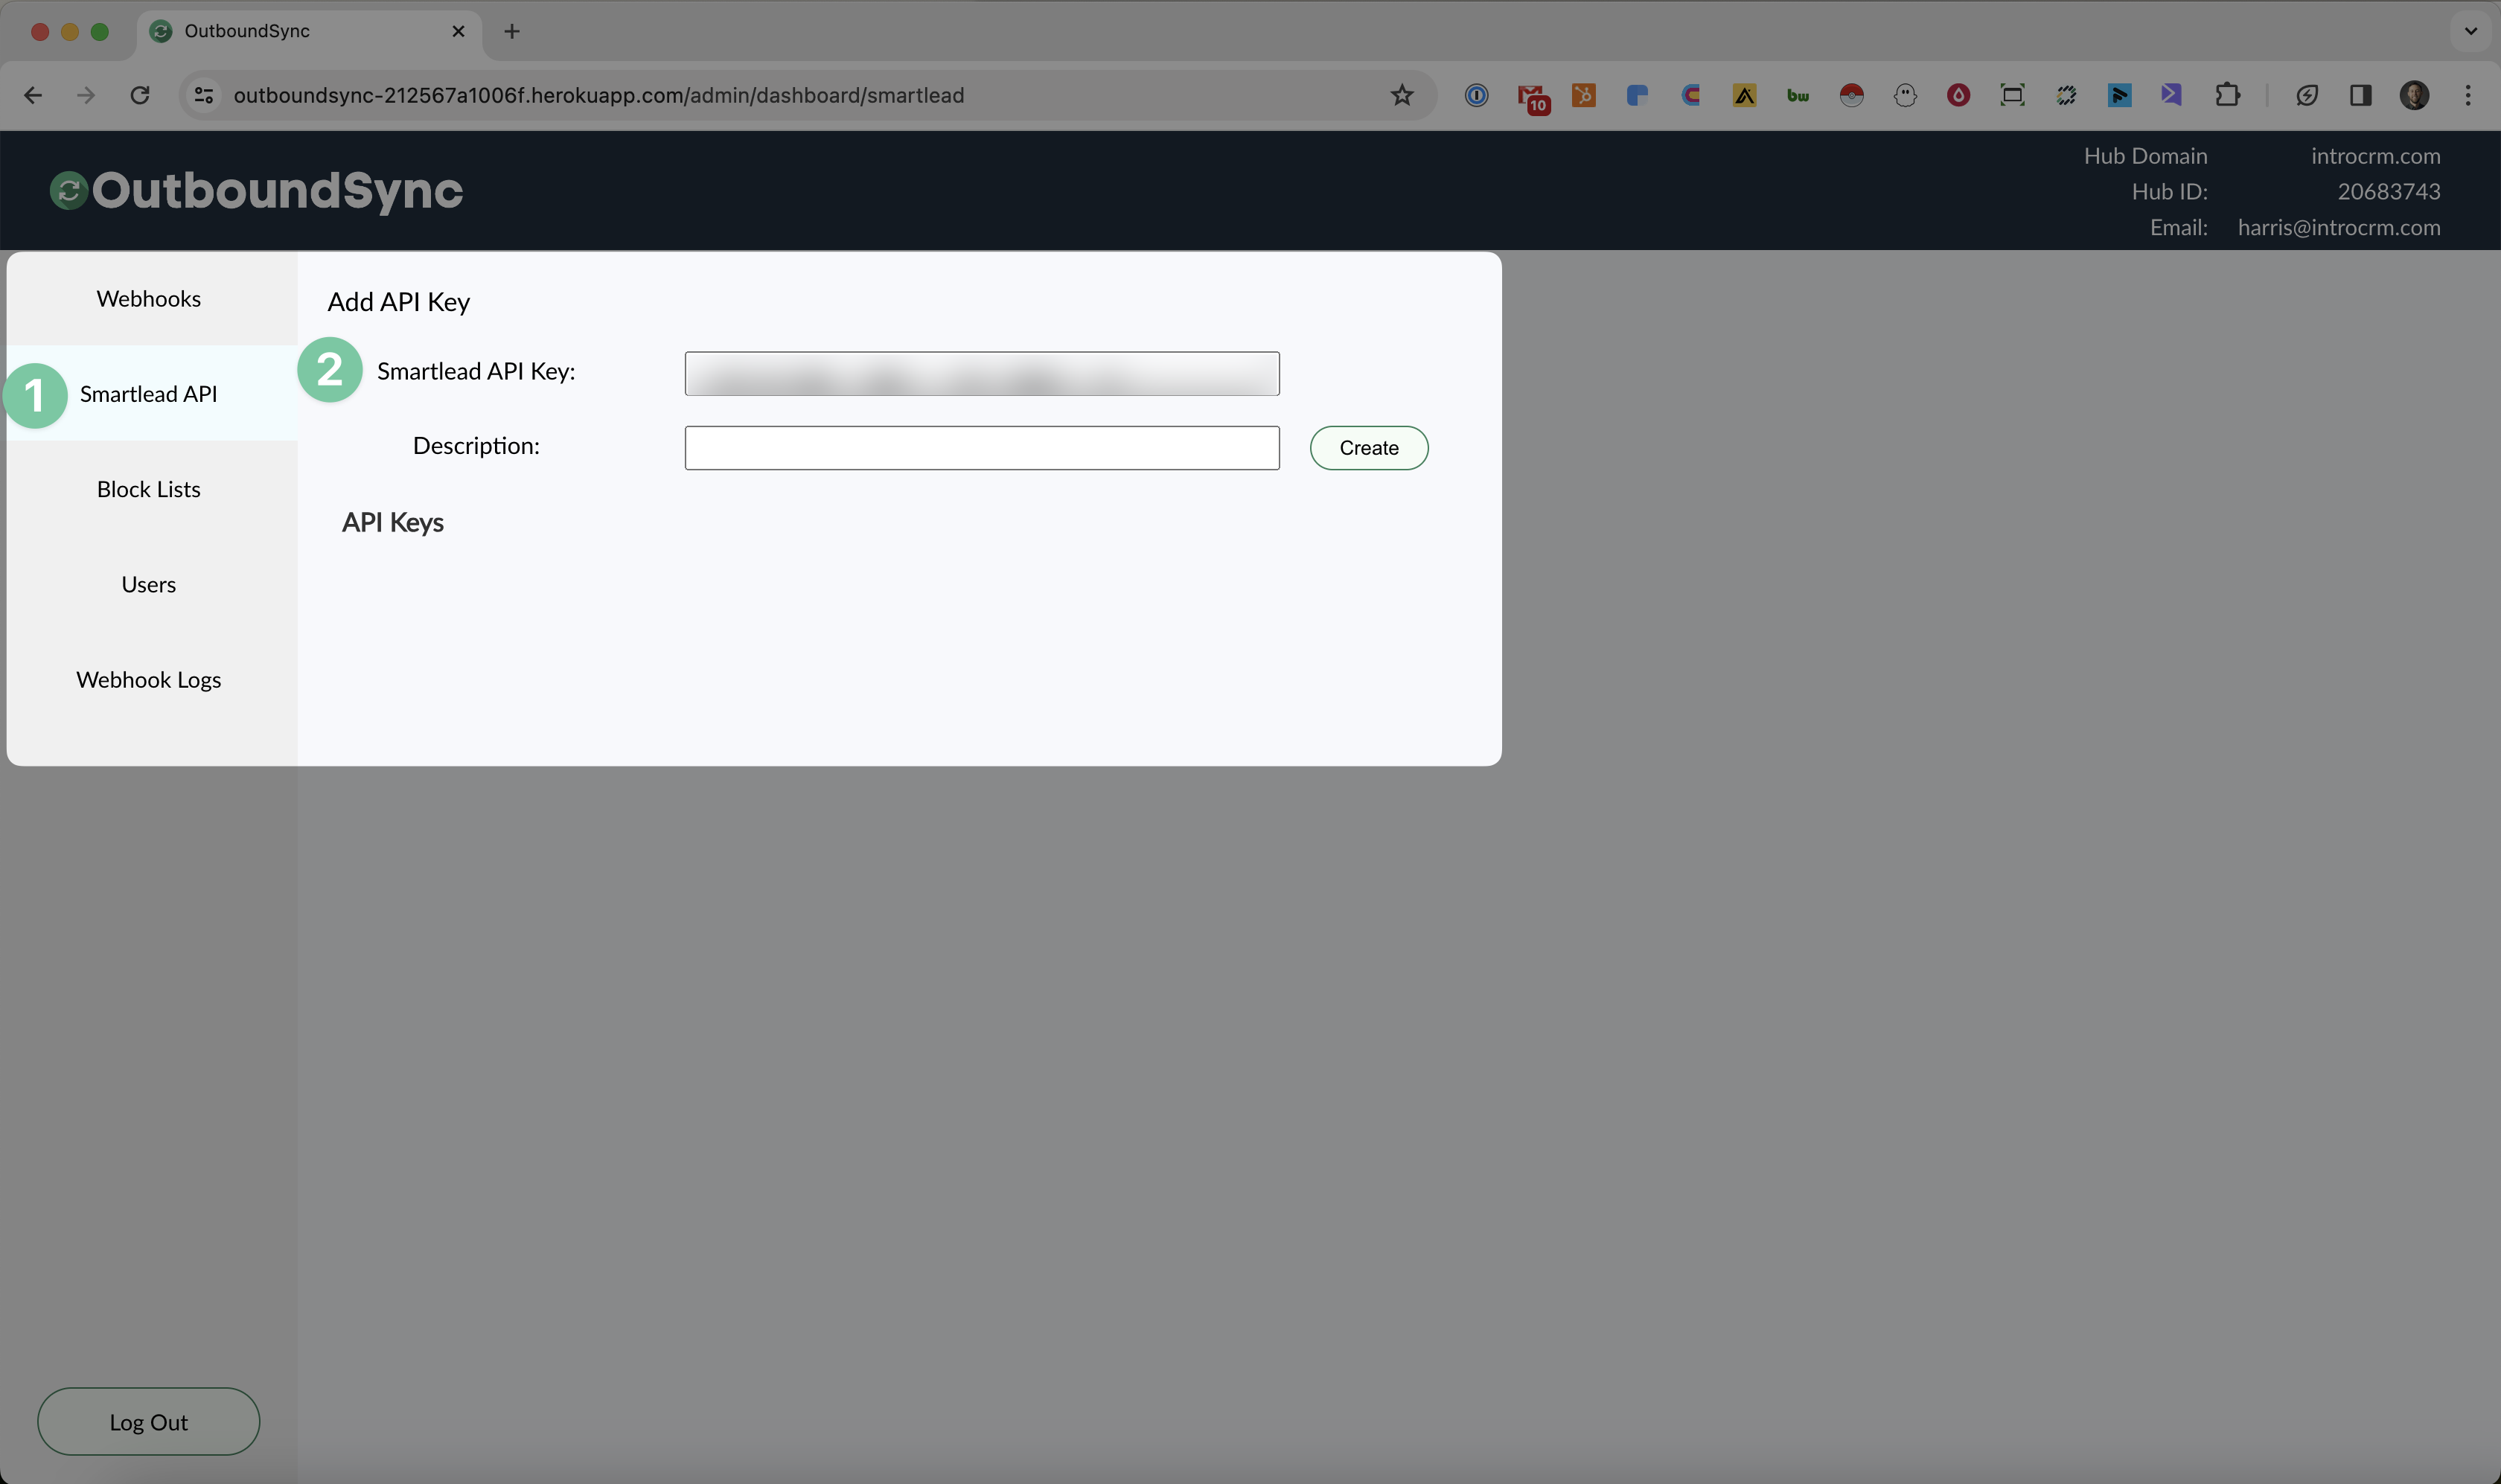
Next, go to OutboundSync and head to the Smartlead section of your account. (See #1 in the image below.) Here's a link:
https://app.outboundsync.com/admin/dashboard/smartlead
Paste your Smartlead API key into OutboundSync. (See #2 in the image below.)
Step 3. Add a description for your webhook.
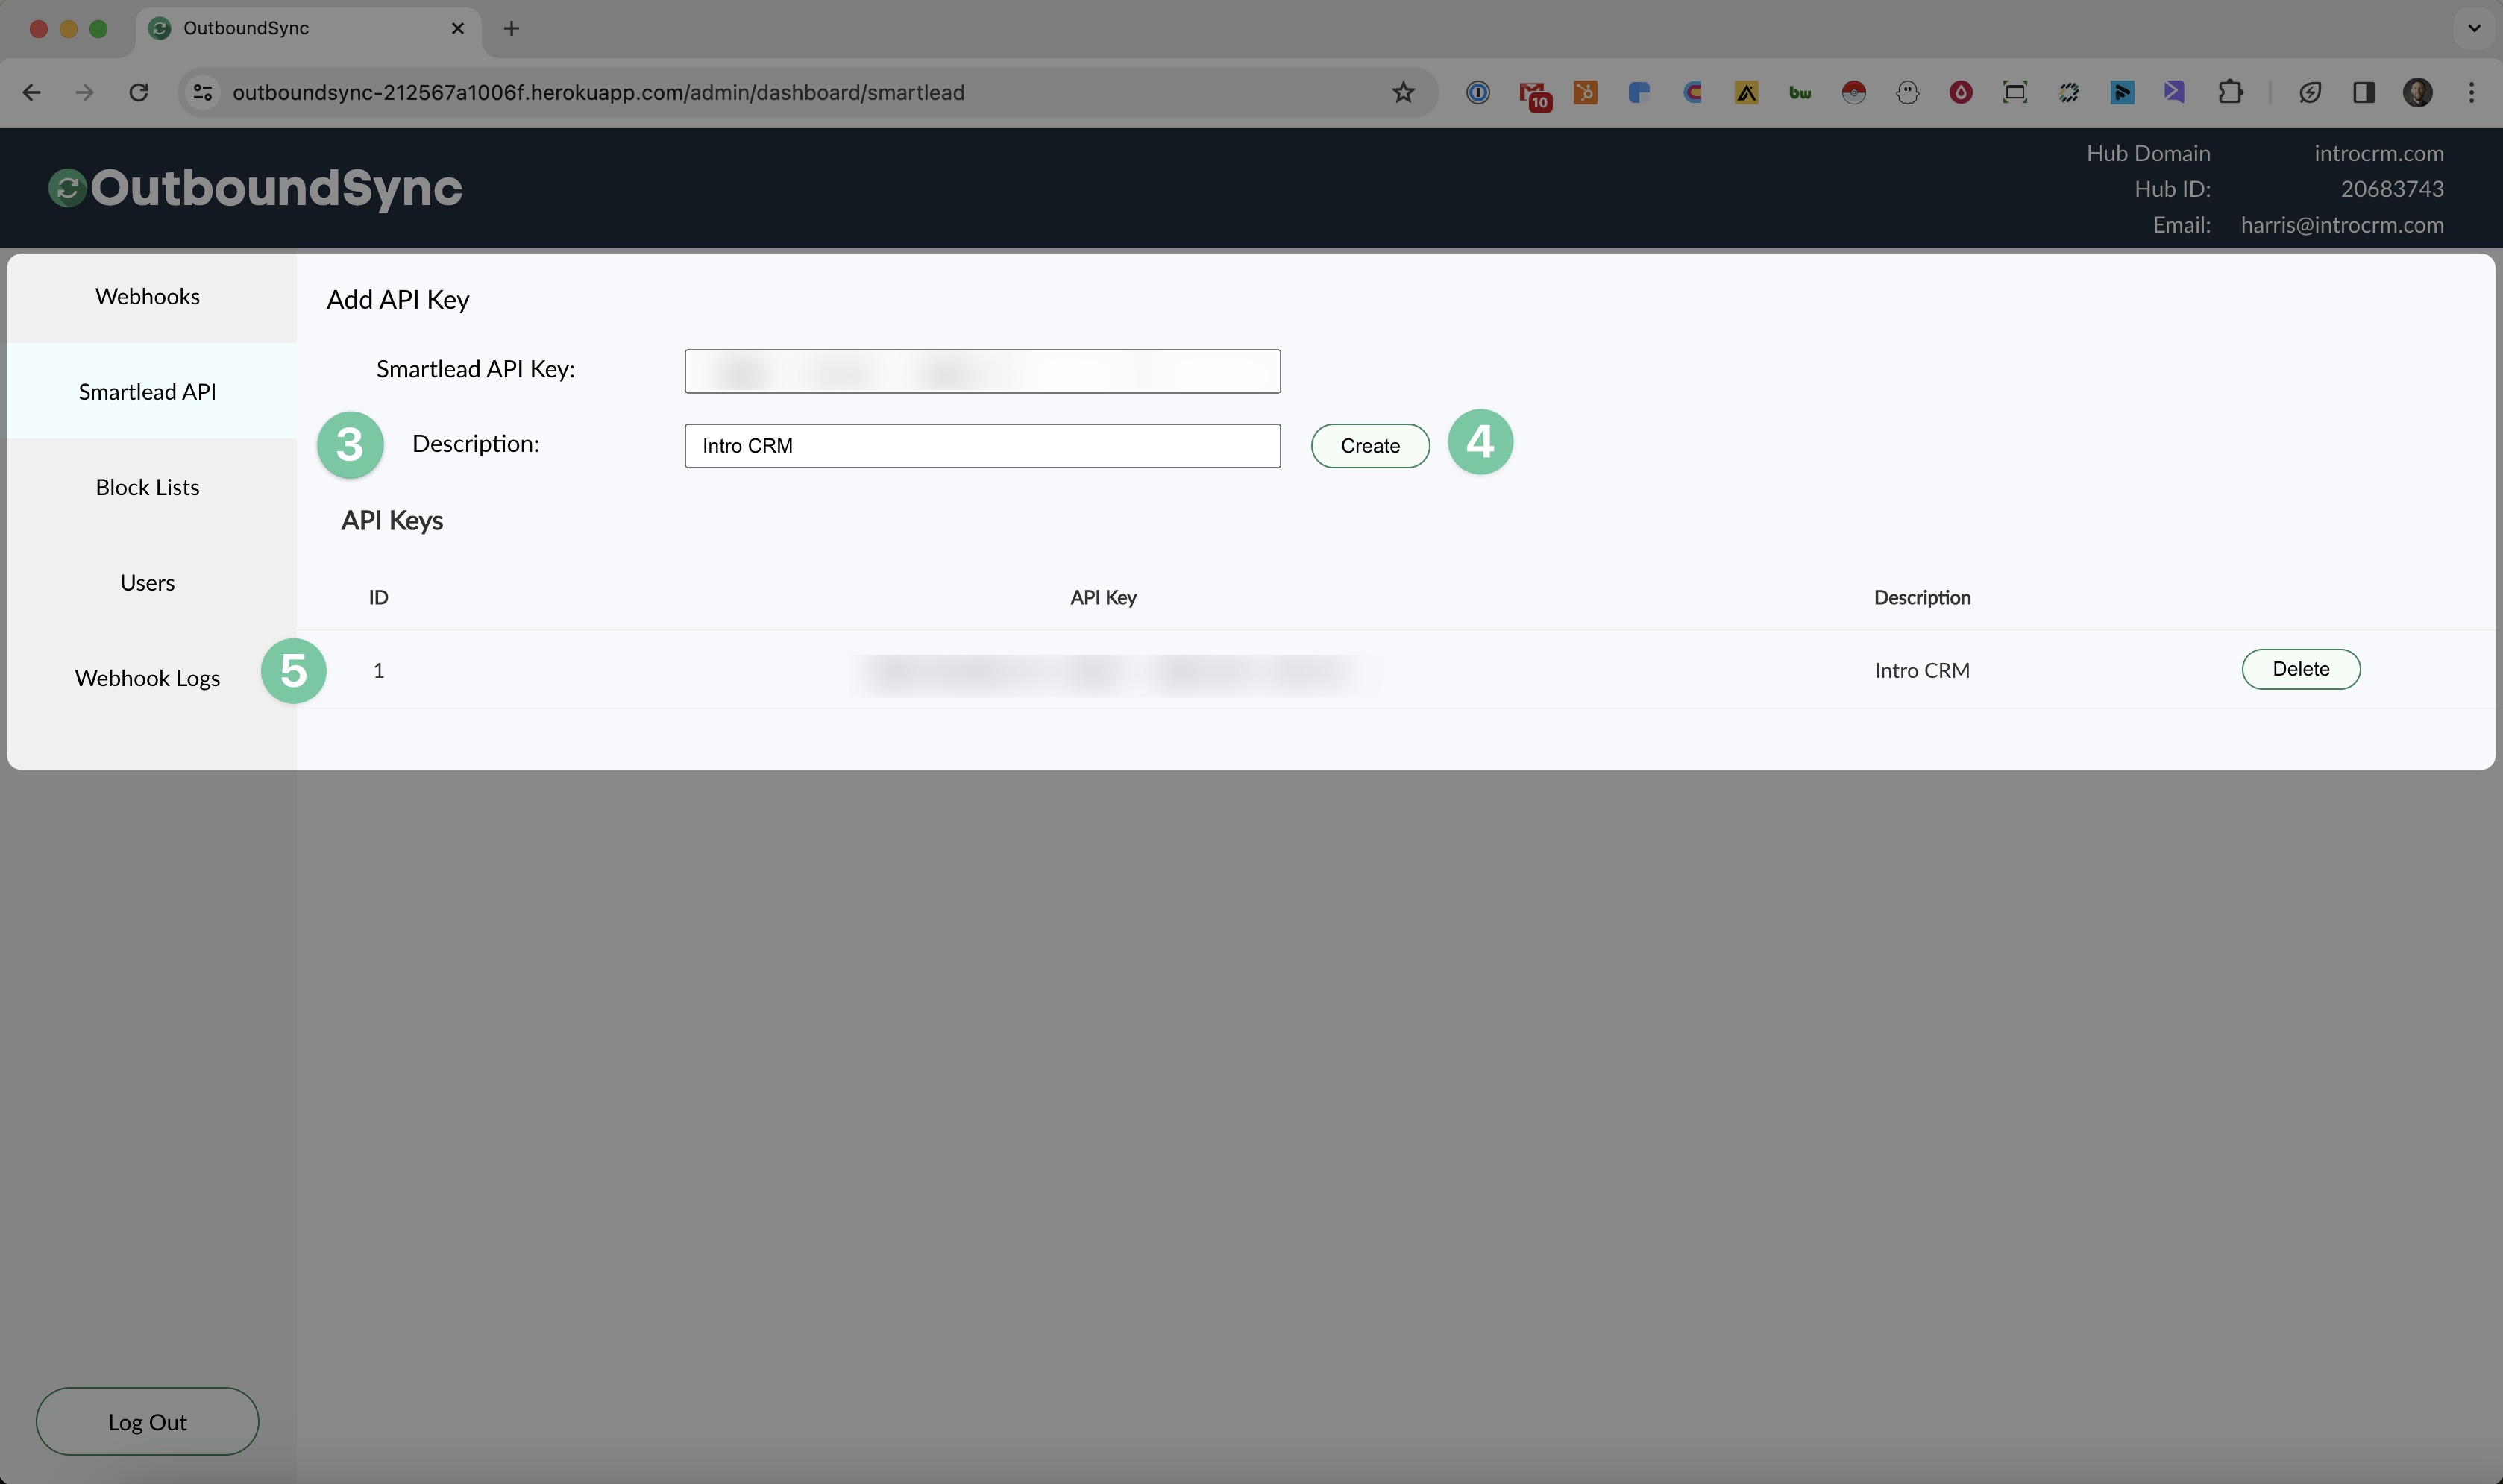
Add a description. (See #3 in the image below).
This can be anything that will help you distinguish which Smartlead account you want to interact with when you are using OutboundSync.
Step 4. Create your API connection inside of OutboundSync.
Finally, click "Create" to create this API connection inside of OutboundSync. (See #4 in the image below).
You should immediately see your new API connection show up in the API Keys table on your screen. (See #5 in the image below).
You're done! Now OutboundSync can send data, such as contacts or domains for the blocklist, to your Smartlead account.